Providing a self-service catalog can be a great way to allow users in an organization to quickly get applications and services they need. However, when a catalog is presented to an organization it is important that there are some guardrails and governance around those requests from the catalog. Policies such as “Lease Times” help by eliminating resources that are not being used and ensuring that users know they cannot keep something forever. Governance is a key aspect of building a cloud-like experience for an organization and now vRealize Automation contains “Approval” policy definitions to allow for even greater control.
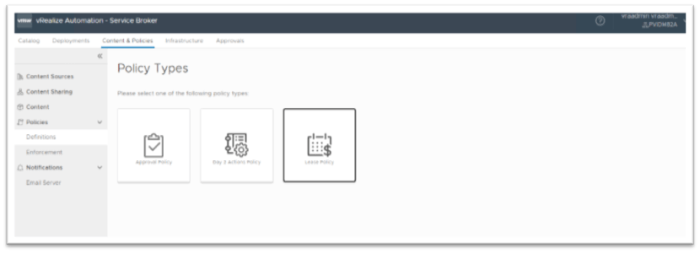
In this post I will demonstrate how to setup Approval Policies, in vRA 8.2 we have 3 types of policies.
Approval Policy, Day 2 Action Policy and Lease Policy
1. Approval Policy
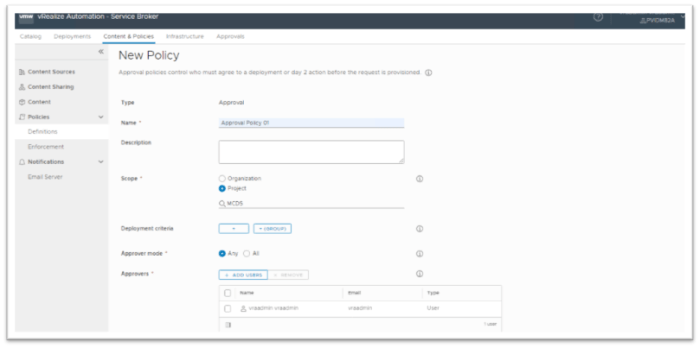
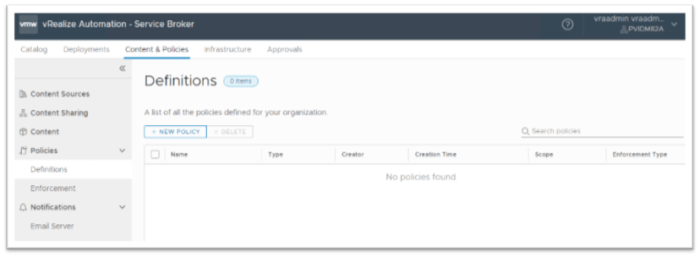
1. Login to vRealize Automation > Service Broker > Content and Policies > Policies > Definitions > New Policy

2. Select Approval Policy

3. Enter name of the Approval policy and fill all other details once done click on Create.
Scope – this determines if the policy is applicable to all deployments or just to deployments within a certain Project. To learn more about Projects go here.
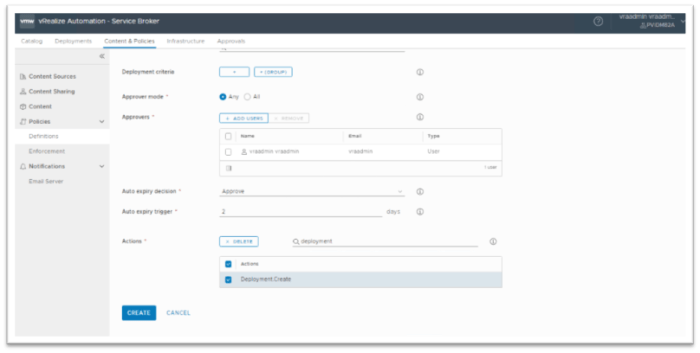
Deployment Criteria – if you want to further refine when the policy is applied then you can add policy criteria. Policy criteria options are:
blueprint: choose a blueprint that was created in Cloud Assembly
catalog item: choose any catalog item that is published in Service Broker catalog
deploymentCreationCost: requires integration with vRealize Operations Manager. This criteria enforces the policy based on
estimated cost of the deployment.
deployment: choose an existing deployment and apply an action that you want to be the trigger for the approval (e.g. – Deployment.Poweroff)
requestedBy: choose a user in the system, when this user requests an item it triggers an approval
resources: choose a resource that will trigger an approval (e.g. – Cloud Zone, Flavor, or Image etc.)
Approver Mode – choose whether just one or all approvers need to approve the request.
Approvers – click the “Add Users” button to add approvers. They will get an email when an approval request is initiated.
Auto Expiry – choose either to Approve or Reject a request after a period of no response from approvers
Auto Expiry Trigger – choose in “Days” how long the request can live before the auto expiry action takes affect
Actions – search for approval actions that would be triggered at time of request.
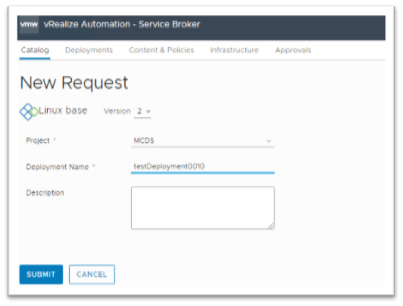
 4. To validate the Approval policy Click on Catalog and click on Request in one of the catalog items and Select the Blueprint version, enter a deployment name, select the project and click on Submit.
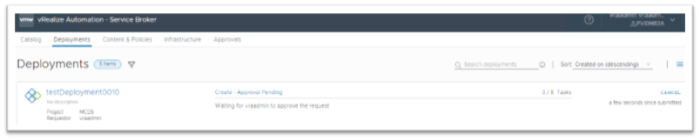
5. Click on Deployments and observe that it’s in “Approval Pending” state
6. Login to vRealize Automation using the Approver’s user account, click on Service Broker > Approvals
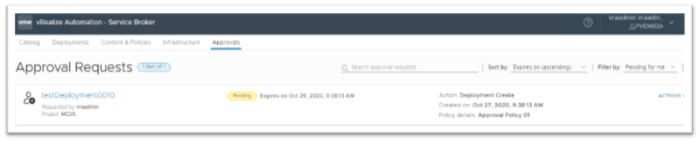
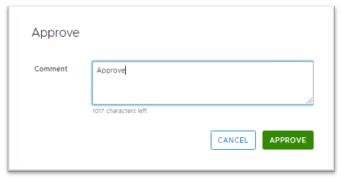
7. Click on Actions and select Approve/Reject as per your requirement write a comment and click Approve/Reject.
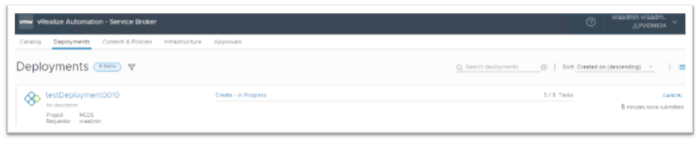
8. Click on the deployment and you can see it move to In Progress
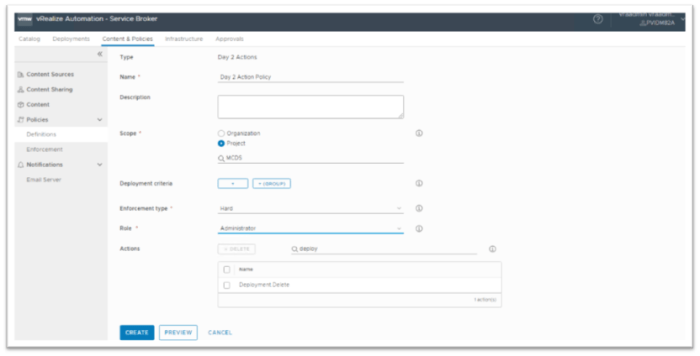
2. Day 2 Actions Policy
1. Login to vRealize Automation > Service Broker > Content and Policies > Policies > Definitions > New Policy
2. Select Day 2 Action Policy

3. Enter the Name, Scope, Deployment Criteria, Enforcement type, Role, Actions and click Create.
3. Lease Policy
1. Login to vRealize Automation > Service Broker > Content and Policies > Policies > Definitions > New Policy

2. Select Lease Policy
3. Fill Name, Scope, Deployment criteria, Enforcement Type, Maximum lease, Maximum total lease, Grace period click on Preview to view the impact and click Create.

That’s it from this post. I hope you enjoyed reading it.
