In the post I will demonstrate how to configure the vCenter plug-in within the vRealize Orchestrator client: So, let’s get stared.
- Log in to vRealize Automation Orchestrator client as a user having the appropriate permissions to use the Orchestrator client.
- In the left pane Click on Library and Workflows.
- In the workflow library, search for Add a vCenter Server Instance workflow and click on Run.

- A dialog box will open and prompts for the following input:
-
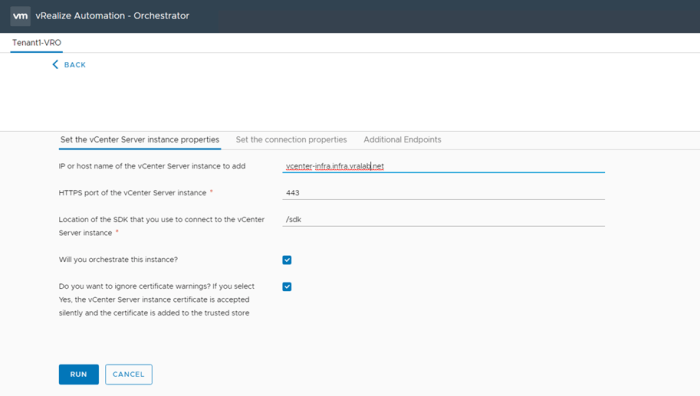
- IP or host name from the vCenter Server.
- The HTTPS port is 443.
- Enter “/sdk” within the Location of the SDK input box.
- Select Yes for Will you orchestrate this instance.
- With the Ignore Certificate Warnings checkbox, select Yes.
- IP or host name from the vCenter Server.
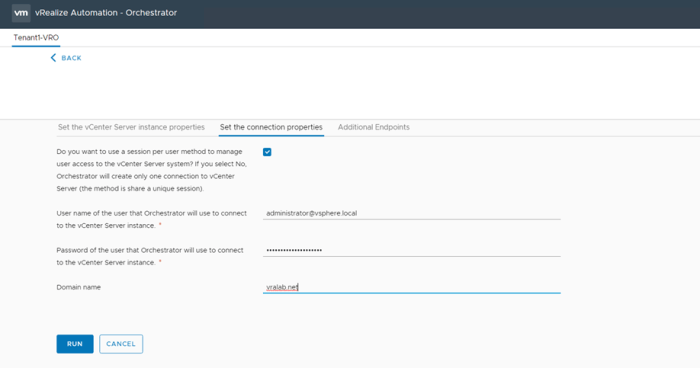
- Click on second tab “Set the connection properties”, it will ask for below details.
-
- For Use shared Session select Yes.
- In the Username for Orchestrator to connect to vCenter Server field, enter administrator@vsphere.local.
- Provide the Password of the user.
- Enter the Domain name.
- For Use shared Session select Yes.
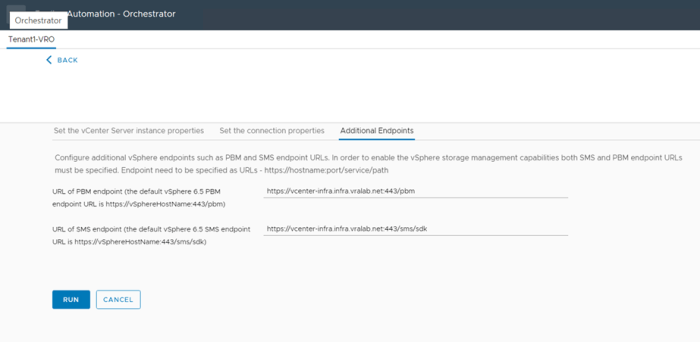
- Move to 3rd tab Additional Endpoints and verify the details as below.
-
- URL of PBM endpoint default is https://vcenter-infra.infra.vralab.net:443/pbm
- URL for SMS endpoint default is https://vcenter-infra.infra.vralab.net:443/sms/sdk
- URL of PBM endpoint default is https://vcenter-infra.infra.vralab.net:443/pbm
- Now click on Run and it will start the workflow.
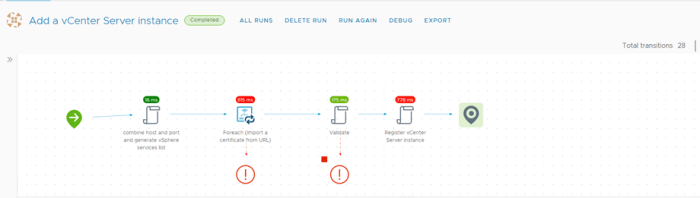
- Once the workflow run successfully and completed, you can see your vCenter server added in vSphere vCenter Plug-in

That’s it for this post. 🙂
Hope you like reading this post. If you think this post is helpful to you, please like & share also comment if you need any further discussion.
