With the release of vRA 8 VMware added a “Launch QuickStart” option to helps, the cloud administrator, set up on-premises vCentre Server so that we can provision resources using vRealize Automation, populate the self-service catalog, and deploy our first blueprint to vSphere instance. This makes the setup and consumption of vCenter into vRA much easier and quicker with less potential for error.
Let’s do a vRealize Automation QuickStart Walkthrough for vCenter.
- Open vRA url and click on “Go to Login page” and login in vRA.

- When you log into vRA you will see an option called “Launch QuickStart” in the QuickStart dialog box. Click on that.

- When click on “Launch QuickStart” you will see two options vCenter server & vCloud Foundation. In my case I will choose vCenter.

-
Once the vCenter option is chosen it will ask for vCenter details. Fill all details and click on “Validate” if gives a certification popup accept.
Once the validation will successful, click on “Create and go to next step”

- In these windows it will give option to configure NSX endpoint with vRA to consume, in my case, it is NSX-V. Provide all details and click on “Validate and Create”
Once validation successful click on “Next Step”

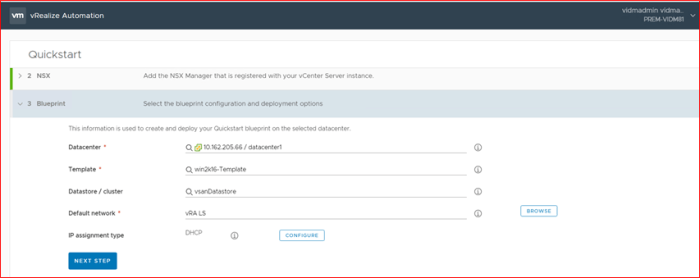
- In this step you can select details, like Template, Datastore, Network and IP assignment type for Catalog Item. Provide all the details and click on “Next Step”.
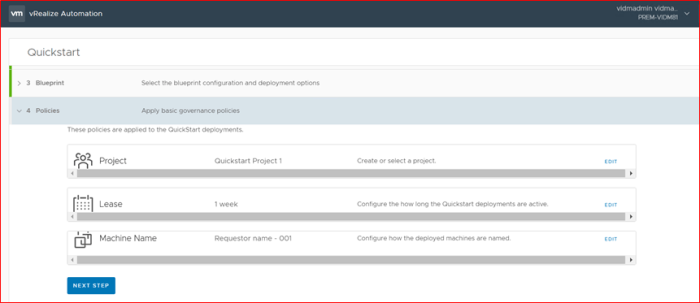
- In this step you can edit the Project name, provide a lease policy and a machine naming policy so that all the deployments have the same lease time and follow a standard naming convention.
These policies are applied to deployments associated with the QuickStart project. You can edit this option as per your requirement.
- Edit the project name.
- Edit the lease and select the time after which the resources are destroyed if not renewed by the user.
- Edit the machine name and select the naming convention that you want to use.
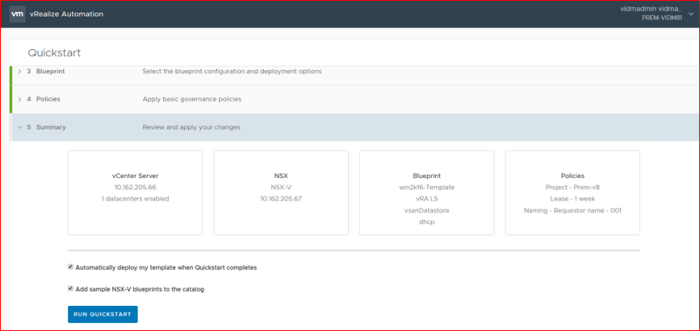
- Once you will choose the policies and click “Next Step” it will show you Summary page with all the details added. Review your configuration.
Also, you will get option to select checkbox if you want to deploy a vm just after QuickStart completes and Add a sample NSX-V blueprint to the catalog if you want to. In my case I choose both as to verify the deployment and catalog item.
- Once reviewed the summary and select your option click on “Run QuickStart”.
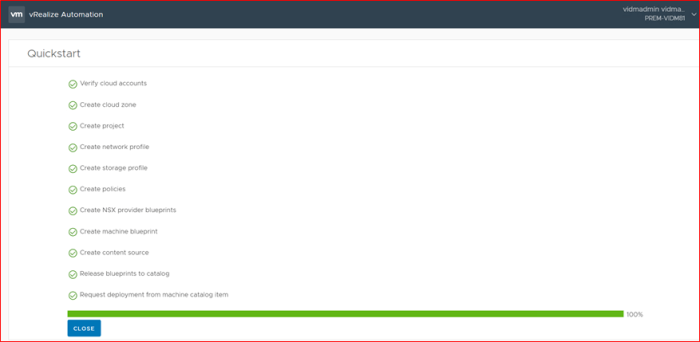
- You can see below progress bar will show you the progress status. Wait for it to complete, once complete click on “Close”.
- Once the deployment is complete, you can see the status of my first vm deployment under Cloud Assemblyà Deployment

- And completed successfully.

Tip: After you run the QuickStart first time, the QuickStart is added as a tile on the console services page. You can run it again to add new vCenter Server or Cloud Foundation instances.

Hope you like reading this post. If you think this post is helpful to you, please like & share also comment if you need any further discussion.
