In previous post we did small deployment of vRealize Automation through LCM 2.1, in this post we are going to deploy vRealize Automation Medium Deployment with HA & Load balancer.
Hardware Specification:
vRealize Automation Hardware Specifications and Capacity Maximums can be find here.
System Requirements:
A medium deployment must meet the appropriate system configuration requirements.
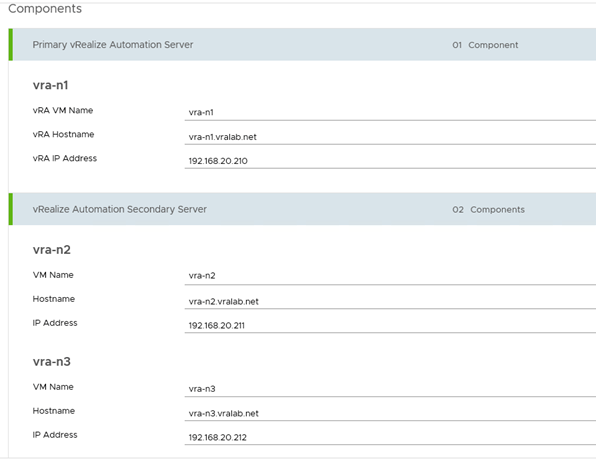
Virtual Appliances
- vRealize Automation appliance 1: vra-n1.vralab.net
- vRealize Automation appliance 2: vra-n2.vralab.net
- vRealize Automation appliance 3: vra-n3.vralab.net
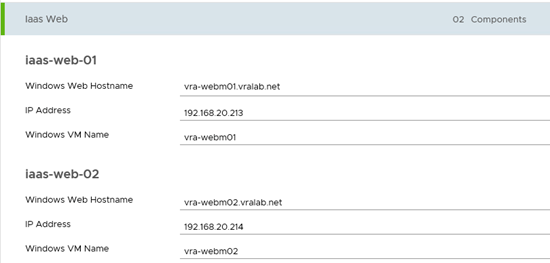
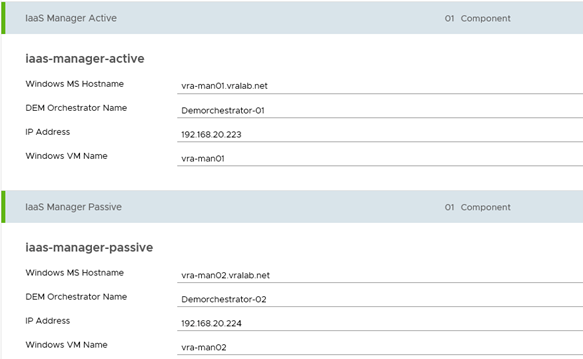
Windows Server Virtual Machines
- Infrastructure Web/Manager Server 1 (Active Web or DEM-O, Active Manager): vra-webm01.vralab.net
- Infrastructure Web/Manager Server 2 (Active Web or DEM-O, Passive Manager): vra-webm02.vralab.net
- Infrastructure DEM Server 1: vra-dem01.vralab.net
- Infrastructure DEM Server 2: vra-dem02.vralab.net
- Infrastructure Agent Server 1: vra-prox01.vralab.net
- Infrastructure Agent Server 2: vra-prox02.vralab.net
Database Servers
- MSSQL Failover Cluster Instance: vra-db01.vralab.net
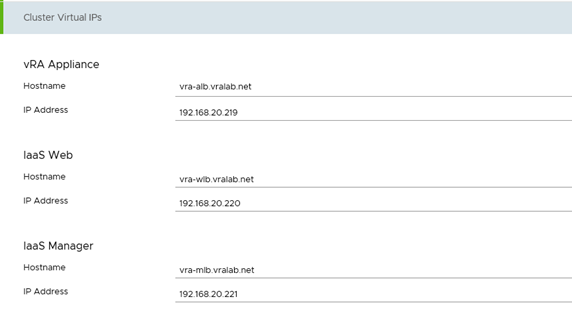
Load Balancers
- vRealize Automation appliance load balancer: vra-alb.vralab.net
- Infrastructure Web load balancer: vra-wlb.vralab.net
- Infrastructure Manager Service load balancer: vra-mlb.vralab.net
Certificates: SSL certificate is required with all the server details
Ports:
Required port list details can be find on VMware site
Prechecks:
Assuming SQL server has been built and ready as per request.
SSL certificate is created and ready for use.
All required Ports are open in Firewall.
Load balancer is configured as per requirement.
Installation Procedure:
- Login to vRealize LCM console from https://IP-or-FQDN/vrlcm using credential
User: admin@localhost
Password: vmware
- Go to home tab and click on Create Environment, you will land to Environment data page. Select the Data Centre from the dropdown, give a name to your environment and fill other details then click Next.

- In this page you can choose the product you are going to install in your environment, like vRealize Automation, Network Insight, Log Insight, Business for Cloud, Operations. In this post will go with vRealize Automation only.

- Read and accept the EULA and click Next.

- Add you licensing details and click Next

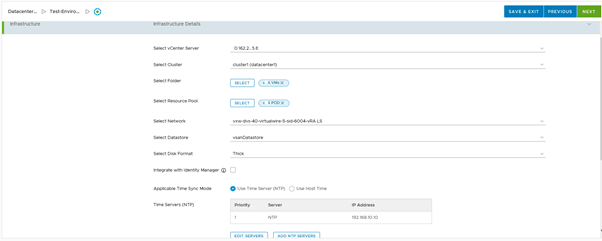
- Select all the infra details and add NTP server then click Next.
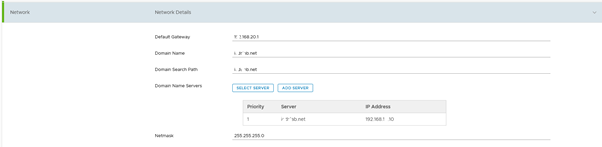
- Provide Network details and move Next.
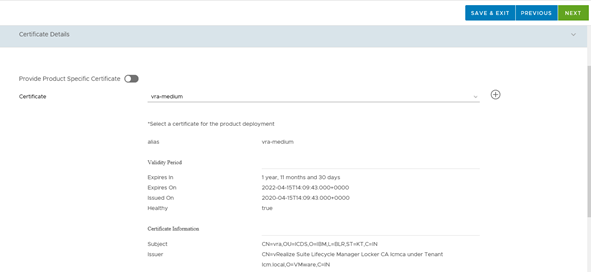
- Add your certificate and next
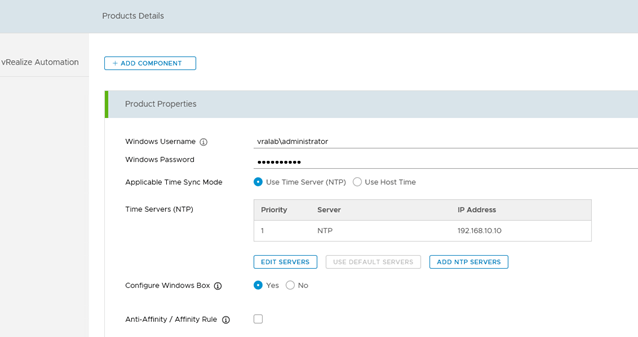
- Provide product details, start with product properties, windows username, NTP configuration. Choose Yes, under Configure Windows Box option to deploy the windows vm through lcm.
- Specify the VIP address for the vRA appliance, IaaS-Web and IaaS-Manager.
Tip: At this point of time you should have your DNS records ready and a CNAME corresponding to each vip is created. Also, your load balancer configuration should be ready where secondary member in each pool set to disabled and monitors set to None.
- Fill all the details in windows box, you need to either specify an iso or windows template here. vRLCM will use iso/template to deploy windows vm on your behalf and then configure it.

- Now we must specify all the component details which are required to deploy our vRA stack.


- Once all the details have been filled up click on next.
-
In the Precheck page, click on Validate & Deploy (will deploy the windows vm as mentioned in product page), once its successful completed, click on Run-Precheck and wait for it to complete successfully as below.


Tip: If something is not right, it will throw error and possible fix for the issue. Follow the recommendation and try to fix the error before moving forward.
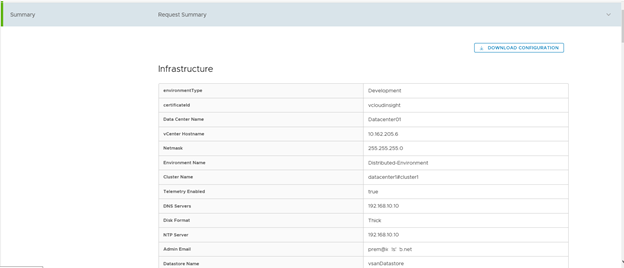
- Review the summary & download the configuration file for future reference. Click on Submit to start the vRA deployment.
- Deployment status can be view in Request tab. Review the status till completion.

- For me it took around 2hrs. to complete the deployment.

-
Once deployment complete successfully, we can validate the setup by hitting the vRA VIP/FQDN.

That’s it for this post. In the next post we will start initial configuration of vRA 7.6.
If you think this post is helpful to you, please like & share. All comments are most welcome for further discussion.
