The architecture of vRA 8 has been completely change from what it was till 7.6. The vRealize Automation 8.1 runs on Photon OS, with a broadly leveraged microservices architecture using Kubernetes and Docker. vRA is comprised of numerous services, running in separate containers, with a PostgreSQL database per container, RabbitMQ serves as the message broker.
In this post I am going to deploy vRA 8.1 through Easy Installer. vRealize Easy Installer helps you install vRealize Automation and VMware Identity Manager in less time than it would take to install individual products. vRealize Automation is installed, configured, managed, and upgraded only through vRealize Suite Lifecycle Manager. Here is step-by-step process of deploying vRealize Automation, vRealize Suite Lifecycle Manager, and VMware Identity Manager by using the vRealize Easy Installer.
With vRealize Easy Installer, we can:
- Install vRealize Suite Lifecycle Manager
- Install or import VMware Identity Manager
- Install a new instance of vRealize Automation
- Register vRealize Automation with VMware Identity Manager
The following system resources are required to install vRealize Automation and VMware Identity Manager. All this system requirement details can be found at VMware official link.
vRealize Easy Installer supports
- VMware Identity Manager 3.3.1 (for import only) and 3.3.2
- vRealize Automation 8.0.0 and later.
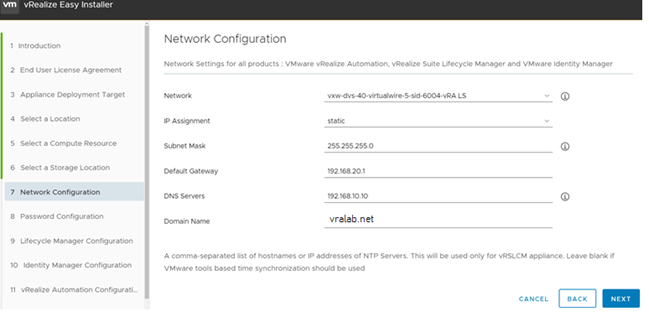
The network requirements for vRealize Automation are:
- Single, static IPv4 and Network Address
- Reachable DNS server set manually
- Valid, Fully-qualified domain name, set manually that can be resolved both forward and in reverse through the DNS server
Hardware Requirements:
|
Component |
vCPU |
Memory (GB) |
Storage (GB) |
|
vRealize Lifecycle Manager |
2 |
6 |
48 |
|
VMware Identity Manager |
8 |
16 |
60 |
|
vRealize Automation |
12 |
40 |
222 |
Ports & Protocols:
vRealize Automation can currently be accessed over port 443. The 443 port is secured with a self-signed certificate that is generated during the installation. When using an external load balancer, it must be set up to balance on port 443. The table provides an overview of the Ports and Port number used for vRealize Automation. For more information on Ports and Protocols for vRealize Automation where you can view port information of various VMware products in a single dashboard and also export an offline copy of the selected data, see VMware Ports and Protocols.
|
Protocol |
Port Number |
|
TCP |
80 |
|
TCP |
443 |
|
TCP |
2379 |
|
TCP |
2380 |
|
TCP |
6443 |
|
TCP |
8008 |
|
TCP |
10250 |
|
TCP |
16000 |
|
TCP |
20849 |
|
TCP |
30333 |
|
TCP |
30821 |
|
TCP |
31090 |
|
UDP |
500 |
|
UDP |
4500 |
|
UDP |
8285 |
|
ESP |
|
|
AH |
|
Load Balancer setting can be found at VMware below link:
- NSX LB – For more information, see vRealize Automation Load Balancing
- F5 LB – For more information, see vRealize Automation Load Balancing
- Citrix NetScaler LB – For more information, see vRealize Automation Load Balancing.
You can access vRealize Easy Installer after you download the executable file from My VMware download page.
Prerequisites
Verify that you have downloaded the ISO file.
Procedure
After you download the file, mount the vra-lcm-installer.iso file.
Browse to the folder vrlcm-ui-installer inside the CD-ROM.
The folder contains three sub-folder for three operating systems. Based on your operating system, browse to the corresponding operating system folder inside vrlcm-ui-installer folder.
Click the installer file in the folder.
The vRealize Easy Installer UI is specific to the operating system. Ensure that you are using the valid UI folder path to launch the installer.
Steps to deploy vRA 8.1 through Easy Installer:
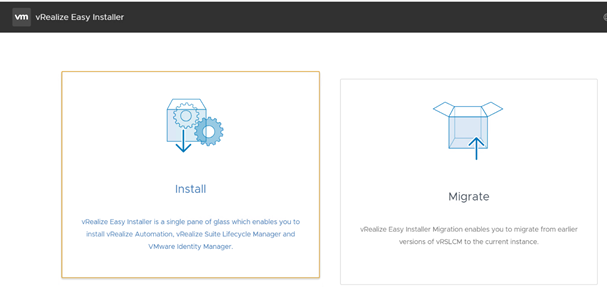
Click Install on vRealize Easy Installer window.
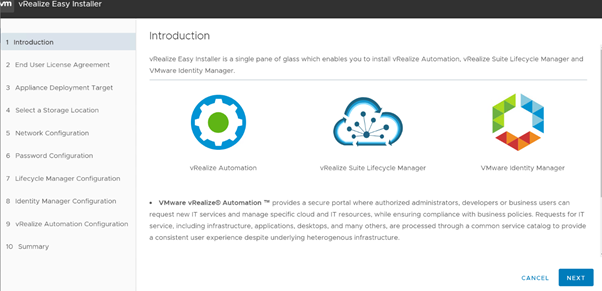
Read the introduction page and move Next
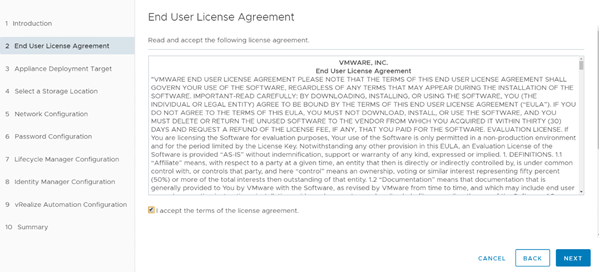
Read the licensing agreement and check “I accept the term of licensing agreement” and do Next.
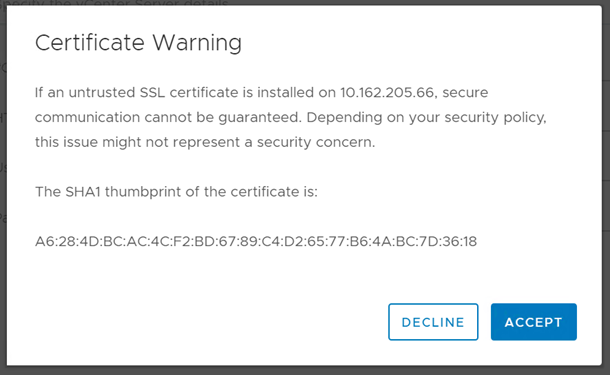
In the appliance deployment target give your vCenter IP/FQDN & credentials and Next.
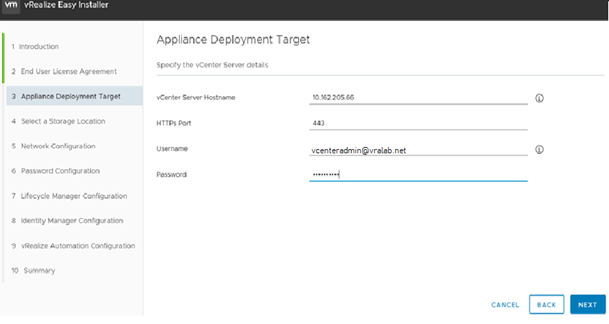
It will pop up for certificate warning, say Accept
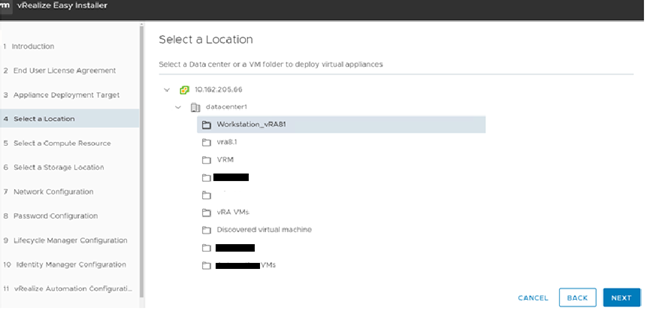
Choose an inventory location to deploy your vms and click Next
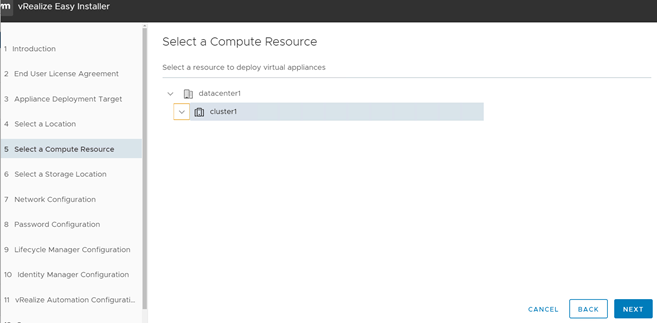
Now select compute resource and click on Next.
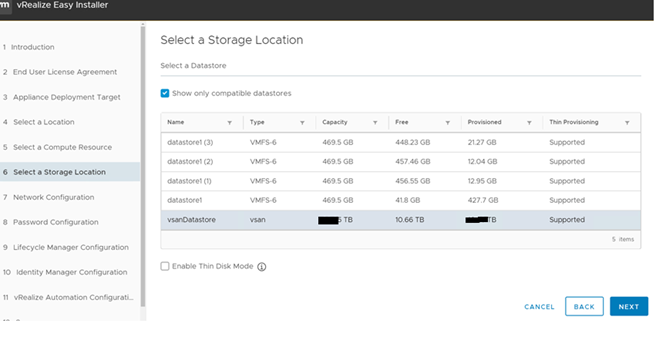
Select datastore from storage location and check/uncheck “Enable Thin Disk Mode” as per your requirement. Move next
Do the Network configuration and move Next.
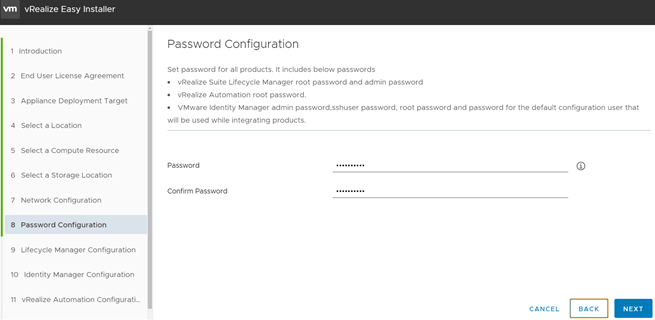
Configure password and move Next. This password is for all the product include vRSLCM root password & admin password, vRA root password,
vidm admin password, sshuser password, root password and password for the default configuration user that will be used while integrating products.
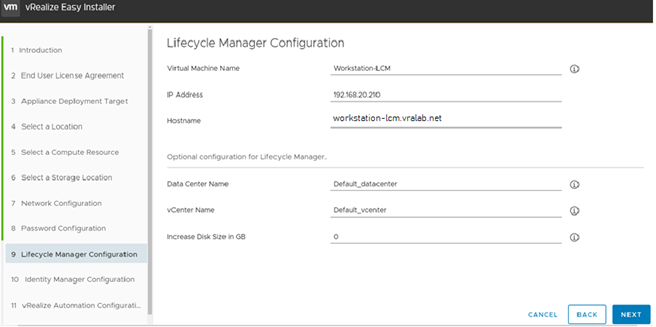
Now configure Life Cycle Manager virtual machine name, IP & hostname and click Next.
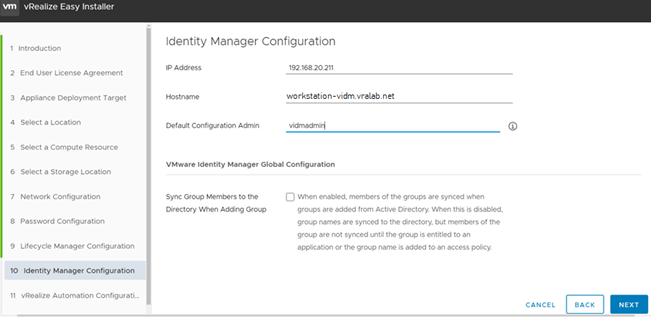
We have option to configure New Identity manager or Import existing identity manager. In my case I am deploying a new Identity Manager.
Configure IP, Hostname & default configuration admin id and move Next
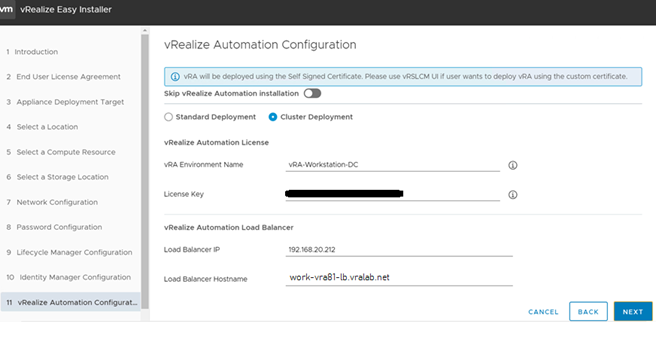
In vRealize Automation Configuration window, select deployment type from Standard Deployment (Single Node) and Cluster Deployment (3 Nodes).
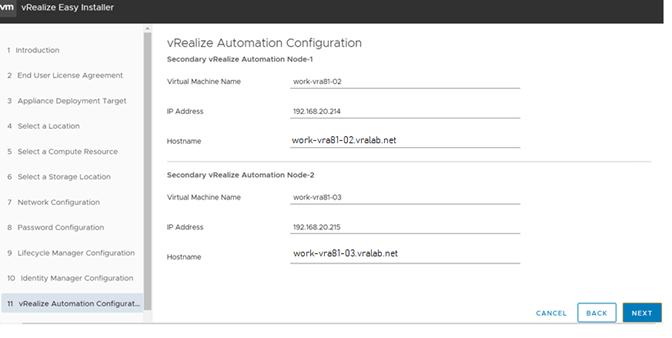
Configure the Environment Name, License key, Load balancer and vRAs node Name, IP and Hostname and move Next.
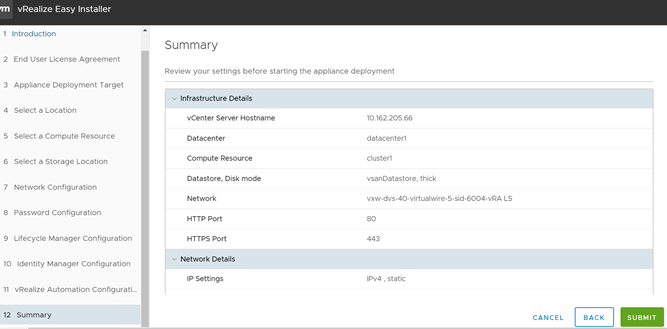
In the Summary page, review the complete details and click on Submit to start deployment.
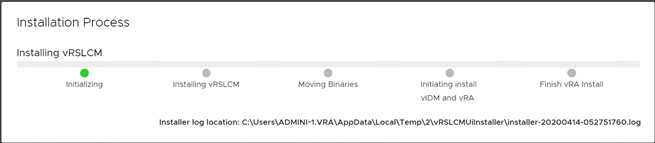
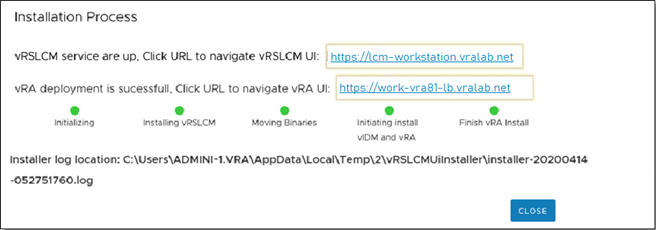
Monitor the installation progress from below Installation Process windows.
Wait for it to complete successfully. You will see a below windows and get link to access lcm & vRA URL.
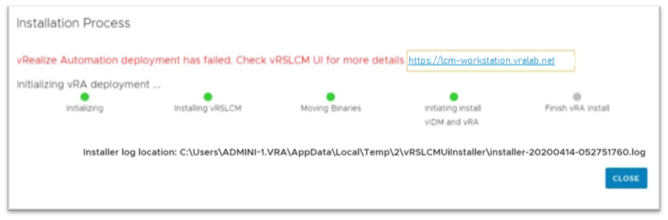
But in my case, I got error that vRealize Automation deployment has failed. Check vRSLCM UI for more details and your lcm address.
https://lcm-workstation.vralab.net
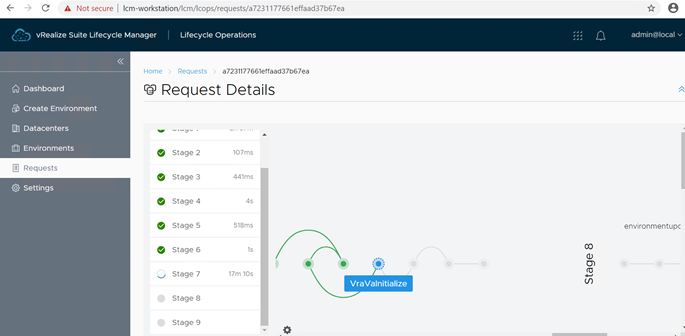
So, I logged in to the vRSLCM appliance for the URL provide in the progress windows and from ‘Request’ tab we can check what is the error in details and can fix it & retry the deployment. Complete process can be monitored from here.
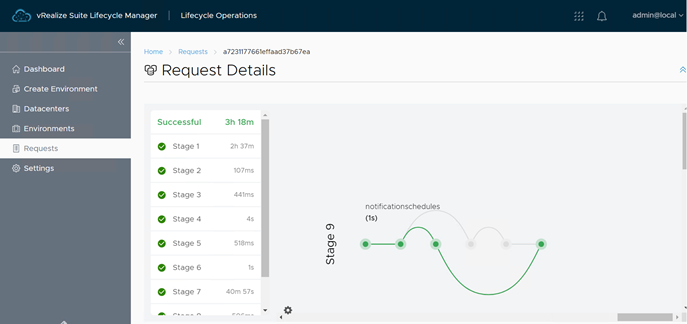
Once it will complete successfully, you can see request details as Successful.
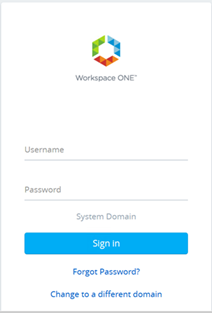
Once the deployment is successful, validate the installation by opening the https://vRA LB FQDN/IP . Click on ‘Go To Login Page and it will
Redirected to Workspace login page.
User credentials: User: as specified in step 10, Password: as specified in step 8

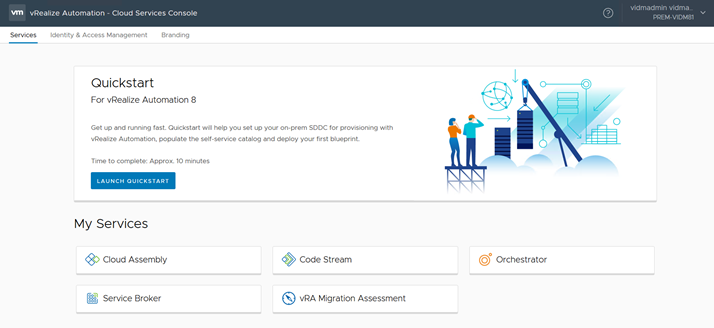
From the console, you can access the new vRealize Automation QuickStart & My services. QuickStart will help us to setup our on-prem SDDC
And My Service will help as below.
- Cloud Assembly, where you add and maintain your infrastructure, create application blueprints, and manage deployments.
- Service Broker, where you provide the blueprints and other templates to your consumers in a catalog. Your consumers can manage their deployments. You also create and apply policies.
- Code Stream, where you create and manage your continuous integration and continuous delivery of software.
- Orchestrator, where you design workflows that can turn anything into a service.
- vRA Migration Assessment, you can only perform a migration assessment on your source environment and any embedded vRealize Orchestrator instances to determine the migration readiness of your vRealize Automation 7.5 or 7.6 source environment. The migration assessment alerts you to any system object and its dependencies that are not ready for migration and that will impact your migration process in the future
We can access the installed components at the following locations and credentials:
- LCM – https:// [lcm IP/FQDN] – User: admin@local, Password: as specified in step 8.
- IDM – https:// [idm IP/FQDN] – User: as specified in step 10, Password: as specified in step 8.
- vRA – https:// [vra LB IP/FQDN] – User: as specified in step 10, Password: as specified in step 8.
If you think this post is helpful to you, please like & share also comment if you need any further discussion.

Good and easy to understand.
Thanks!
LikeLiked by 1 person